Showing posts with label Sweets. Show all posts

Monday, March 29, 2010

CABANE A SUCRE! SUGAR SHACK!


Eggs poached in Maple Syrup & Bacon cooked in Maple Syrup: both are delicious! (scroll down for recipe)

Update in 2011: La pe'tite cabane d'la cote is still going strong and still worth a visit! The Dinning hall has been expanded as well as the petting zoo. It still gets a bit soupy so wear rainboots with wool socks, if you can, to save your boots!

When I first moved to Montreal just after my ninth birthday I went on a Cabane a sucre (Sugaring Off) field trip with my french immersion class. Cabane
a sucre for Quebecers means visiting maple producers who are open to the public in early spring when the sap in flowing. Most Cabane a sucre offer, on location, a traditional breakfast-like meal heavy on the maple syrup. A traditional Cabane a sucre meal may include: homemade meat and/or sugar pies, pea soup, pancakes, baked beans, sausages, bacon, ham, homemade pickles, eggs poached in maple syrup etc... What I vaguely remember about my first time is gleefully pouring maple syrup on everything including my sausages and bacon. It was a revelation! I remember being impressed particularly by the warm communal ambiance that came from having large groups share long tables. Traditional live music added to the festive mood. Horse drawn carriage rides were also offered, as they traditionally are, and were a hit.


Our school visit included a tour of the Cabane a sucre's maple syrup operation with an explanation of how the sap is collected from the trees and reduced to produce the good stuff. Near the end of the visit it was tire d'erable time (maple taffy) where hot, thick maple syrup was poured on to snow and then somehow wrapped around Popsicle sticks to be eaten like candy on a stick.

The Cabane a sucre experience has changed a lot in the last 30 years, and is very popular with tourists (read: tourist trap). Many Cabane a sucre are open all year round and host major events such as weddings. I have been to several Cabane a sucre on daycare visits with my children in the last few years and have been disappointed that the maple syrup must be purchased separately from the meal. The meals themselves have become more assembly line fare than anything with very little actually having been cooked in maple syrup. Some Cabane a sucre are like Disneyland and lack that rustic feel. Some places pack so many people in at one time that it can be difficult to use your utensils without elbowing someone. The Cabane a sucre experience can be, if you do not choose wisely, an overrated and over priced breakfast that you had to drive way too far to partake of. For several years I gave up going because I was disappointed so often.


Fine herb oven baked omelet

Luckily, last year, after much research and a strong desire to present my children with a more authentic Cabane a sucre experience (like that of my first field trip), I found a place called La p'tite cabane d'la cote in Sainte-Scholastique, Mirabel. A tad expensive: 25$ per person on weekends (although less than half that for children with children under 2 eating for free), but well worth it! The pea soup was rich and flavourful, the individual homemade tourtieres au veau (veal meat pies) were gratifyingly meaty, and the Grand-pere dans le sirop (dumplings in maple syrup) were bizarrely addictive. The homemade bread and pickles added that extra touch that was greatly appreciated. I would say all around my meal at La p'tite cabane was the best meal I have had at a Cabane a sucre in years. The rustic dining area held an ambiance that was casual and very lively in the right way. And thankfully we were not packed in likes sardines. And for the very small: there is also a petting zoo that doesn't horrify sensitive animal loving adults.


My kids enjoying Tire at Jean-Talon Market


Oreilles de crisse


I recommend La p'tite cabane particularly for those who have never experienced Cabane a sucre so that they may understand why we Quebecers love it so much. The pictures of La p'tite cabane where taken in late April when the snow had completely melted. I recommend going in mid to late March to get a better feel for the traditional experience. Here is a translated version of the menu offered at La p'tite cabane d'la cote:

Three pea soup
Homemade bread
Individual veal pie
Homemade ketchup
Homemade baked beans
Fine herb oven baked omelet
Smoked Ham
Roasted potatoes
Oreilles de crisse*
Buckwheat pancakes
Dumplings in maple syrup
Maple in the snow (tire)

*Oreilles de crisse is a traditional Quebec dish consisting of deep fried smoked pork jowls. (source:Wikipedia)


Eggs poached in Maple Syrup &
Bacon cooked in Maple Syrup

For the eggs: Very simply add equal parts water and maple syrup to a small sauce pan so that the liquid reaches at least 2 cm / 1 inch high. Bring to a gentle simmer. Crack egg into a small bowl and then gently deposit raw egg into simmering syrup. Poach until desired doneness is obtained. Remove carefully with a slotted spoon, and place on a clean dish towel. Trim poached egg and serve. I would poach no more than 2 at a time.

For the bacon: Cover the bottom of a cast iron pan with maple syrup (about 75 ml / 1/3 cup for a 26 cm / 10 inch pan), and heat pan on medium. Lay bacon in syrup and cooked until desired doneness is obtained. Watch out the maple syrup glazed bacon must be handled carefully as it becomes very hot! Remove bacon with a fork and serve. My rule for cooking bacon and it applies here is : when the bacon looks a minute from done take it out!


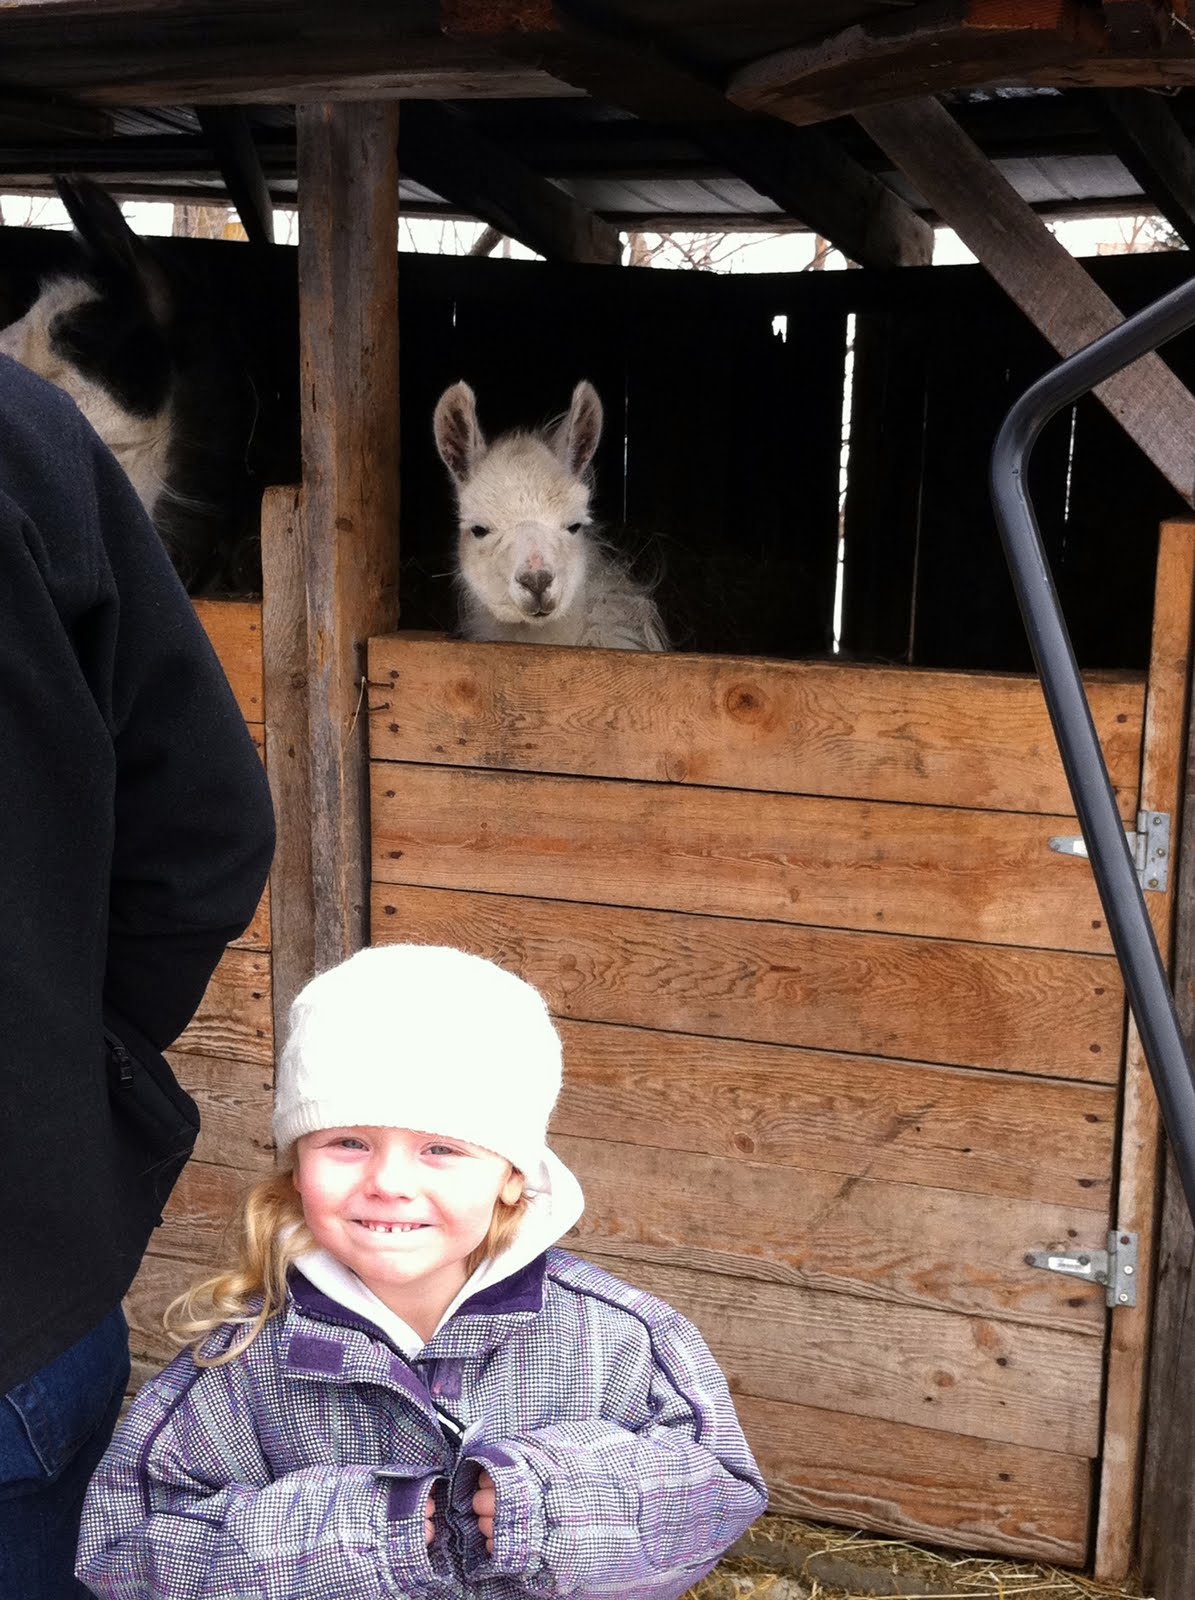
Petting Zoo h
as been recently expanded.

Monday, July 27, 2009

Daring Baker July`s Challenge: Mallows


Mallows (Chocolate Covered Marshmallow Cookies)

Today is the Daring Baker`s July Challenge reveal date and yes I am making the Mallows (Chocolate covered marshmallow cookies), photographing and writing about them all today. It is very last minute, but upon returning from our family vacation this past Saturday in the wee hours of the morn I had tons to unpack, a mountain of laundry and a lot to catch up on. But I am abandoning all other responsibilities today to meet the challenge! I would like to say a special thanks to Future Shop for fixing my camera in time. Phew!


Mallow before dipping


So here goes...

The July Daring Baker's challenge was hosted by Nicole at Sweet Tooth. She chose Chocolate Covered Marshmallow Cookies and Milan Cookies from pastry chef Gale Gand of the Food Network.


Regular and Mocha Mallows before dipping


I made the recipe as is but divided the marshmallow in half and added a tablespoon of instant espresso to one of the halves. Once I had piped out the coffee flavored marshmallow I placed a coffee bean on top before dipping. The marshmallow was pretty sturdy stuff and these cookies where easy to dip (my one worry). I liked the sutler coffee flavour that resulted and think the Mocha Mallows make a nice adult cookie. I especially enjoyed the pleasant crack of biting into a roasted coffee bean. I must say that the cookie base on its own is so so and I would try these again with another short bread recipe.

I have been meaning to make home made marshmallows for a while now and will use the recipe to make some marshmallows that my son can eat and hopefully roast, as store bought marshmallows contain artificial coloring.

All in all a good baking experience.

Unfortunately I completely disregarded the Milan cookies because of time.


Mocha Mallows

Recipe:

Mallows
Recipe courtesy Gale Gand from Food Network Website

Ingredients

  • 3 cups flour
  • 1/2 cup sugar
  • 1/2 teaspoon salt
  • 3/4 teaspoon baking powder
  • 3/8 teaspoon baking soda
  • 1/2 teaspoon ground cinnamon
  • 12 tablespoons butter
  • 3 eggs, whisked together
  • Homemade marshmallows, recipe follows
  • Chocolate glaze, recipe follows

Directions

Blend the dry ingredients in a mixer fitted with a paddle attachment. Add the butter and mix on low speed until sandy. Add the eggs and mix to combine. Form the dough into a disk, wrap and refrigerate at least 1 hour and up to 3 days. When ready to bake, grease a cookie sheet or line it with parchment paper or a nonstick baking mat. Heat the oven to 375 degrees F.

On a lightly floured surface, roll out the dough to 1/8-inch thickness. Use a cookie cutter to cut out small rounds of dough, 1 to 1 1/2 inches. Transfer to the prepared pan and bake until light golden brown, about 10 minutes. Let cool to room temperature.

Pipe a ?kiss? of marshmallow onto each cookie. Let set at room temperature for 2 hours.

Line a cookie sheet with parchment or a nonstick baking mat. One at a time, gently drop the marshmallow-topped cookies into the hot chocolate. Lift out with a fork and let excess chocolate drip back into the bowl. Place on the prepared pan and let set at room temperature until the coating is firm, about 1 to 2 hours.

Note: if you don?t want to make your own marshmallows, you can cut a large marshmallow in half and place on the cookie base. Heat in a preheated 350-degree oven to slump the marshmallow slightly, it will expand and brown a little. Let cool, then proceed with the chocolate dipping.

Homemade marshmallows:

  • 1/4 cup water
  • 1/4 cup light corn syrup
  • 3/4 cup sugar
  • 1 tablespoon powdered gelatin
  • 2 tablespoons cold water
  • 2 egg whites
  • 1/4 teaspoon pure vanilla extract

Homemade Marshmallows: Combine the water, corn syrup, and sugar in a saucepan, bring to a boil until ?soft-ball? stage, or 235 degrees on a candy thermometer. Meanwhile, sprinkle the gelatin over the cold water and let dissolve. Remove the syrup from the heat, add the gelatin, and mix. Whip the whites until soft peaks form and pour the syrup into the whites. Add the vanilla and continue whipping until stiff. Transfer to a pastry bag.

Chocolate glaze:

  • 12 ounces semisweet chocolate
  • 2 ounces cocoa butter or vegetable oil

Chocolate Glaze: Melt the 2 ingredients together in the top of a double boiler or a bowl set over barely simmering water.

Monday, June 29, 2009

Purple icing and a Salad


I made a purple cake for my mother's 65th birthday. The purple color came from blueberries and once again I made butter icing using fruit instead of cream or milk. The icing was a little less stable than the raspberry icing and would not do well on a very hot day.

We also had a BBQ with mergez sausages, marinated lamb shoulder, shrimp and various salads. What was supposed to be a rainy day turned out to be a perfectly sunny with a light breeze that kept the bugs away. My kids were low maintanace and my husband and I got everything ready for the small party at a non frantic pace. All in all a very nice Sunday.

Blueberry sauce for icing:
I threw about 1 cup of blueberries in a small sauce pan with 2 tablespoon of sugar and about 2 tablespoons of water, and brought it all to a simmer. Once the blueberries turned bright purple and the sugar dissolved (2 minutes) I removed the sauce pan from the stove and pressed the blueberry sauce through a fine mesh sieve. I let the sauce cool and used it in the icing recipe. It resulted in a lovely color and I am happy with the results. The sauce itself also goes very well with lemon cheesecake. I made the combination a long time ago and should dig up the recipe and share it here.


Blueberry Butter icing
  • 1 cup (250 ml) butter, softened
  • 6 cups ( 1.25 L) icing sugar
  • 2/3 cup (150 ml) blueberry sauce

In a large bowl beat together butter and icing sugar. Gradually beat in the blueberry sauce. If too wet, add more icing sugar in 25 ml ( 1 tbsp plus 2 tsp) additions.


Fresh summer salad
Below is one of the salads I prepared. It consists of blanched asparagus, cherry tomatoes, bocconcini cheese, basil leaves, avocado oil, a balsamic vinegar reduction reduction, and salt and freshly ground pepper. I started using avocado oil a few weeks ago and have been using it sparingly but frequently every since (it's quiet expensive). It has an unsually high smoke point and is a rich source of nutrients.


Thursday, June 18, 2009

Raspberries: 2 ways


Summer session is starting at my son's daycare and the children are having a party to celebrate. Some of the children are leaving and going on to elementary school in the fall so it will be a last chance for the kids to see each other if they will not be going to the same schools. Parent's have been asked to bring some sort of food platter and I have offered cupcakes because I want to guarantee that my son can have dessert. Its' that pesky artificial food coloring thing again. I was able to make a lovely pink icing with raspberry coulis. I was a little worried initially about the raspberry coulis doing something funky (not in a good way), to the icing but that didn't happen. I wish I knew my food science a little better as it would help with the experimentation. My son loves raspberries, by the way, and doesn't mind pink (yet).


For the Raspberry coulis: I used 2 cups of frozen raspberries expecting to make use of the leftover coulis but if you just want to color your icing use 1 cup of berries. I place the raspberries and a few spoonfuls of white superfine sugar *(depending on how sweet you want it), in a fine mesh sieve over a bowl and as the raspberries melt I press down on the berries with a wooden spoon or rubber spatula to squeeze the juice through. The sugar dissolves in the process. How long this takes depends on whether you use fresh or frozen and how much energy you devout to the squishing of the berries. That's it!

*You can omit the sugar if the coulis is intended for icing only, as the icing sugar is sweet enough.

Raspberry Butter icing
  • 1 cup (250 ml) butter, softened
  • 5 cups ( 1.25 L) icing sugar
  • 2/3 cup (150 ml) raspberry coulis

In a large bowl beat together butter and icing sugar. Gradually beat in raspberry coulis. If too wet, add more icing sugar in 25 ml ( 1 tbsp plus 2 tsp) additions.


The cupcakes are made from a white butter cake recipe and the icing is you basic butter icing with raspberry coulis instead of milk. With the remaining coulis I made raspberry Popsicles. The white butter cake recipe that I used is a go to recipe for me for birthday cakes and so on . I have a preference for white cake over chocolate cake (most of the time),and I also prefer fruit based desserts...It must be the Brit in me.


The cake recipe is Canadian living Magazine's and although I have cut out the recipe I still found it on their site! Click below for recipe:


Raspberry Popsicles

  • 1 cup (250 ml) raspberry coulis
  • 1/4 cup (60 ml ) of 35% cream*
  • 3/4 cup (180 ml ) milk

Whisk together and pour into molds. Freeze.


Yields: 2 cups


*The cream can be omitted here in which case you will get a less ice creamy Popsicle but still a very nice treat.


I am really enjoying these molds! When the Popsicles are frozen I can remove them from their stand and jam them in wherever they fit to make room for other things. Such as lamb shoulder but that is another post.

Saturday, May 30, 2009

Almond anisette biscotti


I love the taste of anise and so does my family. I make almond anisette biscotti often and although it is very Italian it fits in quiet well with the very English tradition of 4 o'clock tea. My source is Canadian Living although variations on these biscotti can be found all over.

I found the dough very soft so I gradually add a little more flour until I get something more manageable. I oil my hands with a little olive oil in order to form the dough.


Almond Anisette Biscotti

Servings: 40

Ingredients

3 eggs
1 cup (250 ml) sugar
1/4 cup (50 ml) unsalted butter, melted1 tsp (5 ml) aniseeds, lightly crushed
2 cups (500 ml) all purpose flour
2 tsp (10 ml) baking powder
1/4 tsp (1 ml) salt
3/4 cup (175 ml) whole skinless almonds
1 egg white

Preparation:

In large bowl, beat eggs with sugar until pale and thickened; beat in butter and aniseeds. In separate bowl, whisk together flour, baking powder and salt; stir into egg mixture. Stir in almonds. Divide dough in half. With floured hands, shape each into 12-inch (30 cm) long log. Place on parchment paper–lined baking sheet. Press to flatten slightly. Whisk egg white until foamy; brush over tops of logs. Bake in centre of 350°F (180°C) oven for about 25 minutes or until firm to the touch and golden. Transfer to rack; let cool completely. With serrated knife, cut each log into 1/2-inch (1 cm) thick slices; place, cut side down, on baking sheet. Bake in centre of 350°F (180°C) oven until firm and golden, turning once, about 15 minutes.


Friday, May 29, 2009

Rhubarb pie


Today I am tallying receipts for work in Excel for most of the afternoon before I go and pick up my kids. Basic accounting is the least glamorous side of food styling. Still accounting is a nice non physical activity and it is about all I can manage today. Bizarrely when I woke up this morning I was having trouble walking. My Achilles tendons were so sore. It dawned on me that being in bumper to bumper traffic on the 15 north, starting in Montreal ending around Mirabel where I was finally able to go above 30 km, is what did it. I drive a standard and was on and off the clutch, breaks and gaz so many times I guess I strained my ankles? Pretty sad stuff. Driving is the least physical of what I do so I had better get back to yoga which I have missed twice because of work.

I have decided that sitting at a desk pouring over receipts should be rewarded with a little pie! So how about this delicious Rhubarb pie recipe. I bypassed pre-baking the crust due to lack of time and it is not soggy. I also spread the streusal topping evenly over the pie as opposed to what the recipes asks. I like this one rustic and not too played with. If you do not have tapioca try corn starch. I also used pecans instead of walnuts.


I also have to include a few pictures of my crab apple and apple blossoms. I wait for them every year and they make me very happy. They are my favorite thing about where we live and I feel very lucky to have so many beautiful old trees on my property.


Wednesday, May 20, 2009

Food Coloring free "Jello" recipe


I
have been practising, since Easter, the art of avoiding feeding food coloring to my children. This is no easy task. I discovered last weekend to my son's dismay that Compliments marshmallows have food coloring in them! Who can tell me which color is required...I am very curious.


Here is a recipe I came up with to replace
Jello as a quick weekday dessert.


Natural fruit jelly with berries
  • 355 ml Concentrated frozen 100% juice (I recommend white grape or apple)
  • 125 ml / 1/2 cup spring water
  • 1 package of gelatin (7 g or 1 tbsp)
  • 1/4 cup frozen mixed berries

Blend the concentrated juice and water together. Transfer 125 ml / 1/2 cup of juice to a small bowl. Sprinkle with gelatin and let sit for a few minutes. Meanwhile, in a sauce pan, bring another 125 ml of juice to a simmer. Remove from heat. Pour over the bowl containing gelatin and stir to dissolve (1-2 minutes). Pour contents of bowl into remaining juice and stir to blend. Divide the frozen berries between 4 small dessert bowls,preferably glass. Fill each bowl with the gelatin juice blend. The berries will lend a attractive pinkish hue to the "jello". Let set in refrigerator (about 4 hours). Serve and Enjoy. To dress these desserts up garnish with a dollop of whipped cream and a mint sprig.

My 2 year old daughter dislikes the berries and picks them out which makes quiet a mess. I continue to stubbornly set berries before her with the hope that one day she will discover she likes them. This technique although tedious for both parties does sometimes work as it did for my daughter with broccoli!


Hi I don't like fruit!

Monday, May 4, 2009

Churros: Savoury or Sweet


Back in the day, when I was a cooking student, my partner and I had to put together 2 different menus which would be made and served by our fellow students in the school dining room. I choose Mexican because at the time higher end authentic Mexican was exciting, and new and I was intrigued by the flavors and ingredients. Ever prepared cactus? I chose the classic pastry churros as one of the elements of a dessert we were offering on our menu. Churros is a deep fried pastry of Spanish origin and they are quiet popular in Mexico. My source then was In the sweet kitchen by Regan Daley.


For some recipe development that I am doing I have been searching the Internet, books and magazines for inspiration. Happily in my searching I stumbled upon a photo on flicker of Parmesan churros. I have never come across even the idea of savoury churros and I was intrigued. The photo was taken, according to Flickr at Manresa Restaurant, Los Gatos, California. Savoury churros do not fit into my development criteria but I wanted to try them for myself. The picture on Flickr presents the churros with what looks like little deep fried green chilies.

Savoury Parmesan Churros
adapted from In the Sweet Kitchen
yield: About 20 churros
  • sufficient quantity canola oil for deep frying
  • 1 1/4 cup of flour
  • 1/4 teaspoon of salt
  • 1/2 cup freshly grated Parmesan or Romano
  • 1/2 teaspoon of freshly ground pepper
  • 1 cup water
  • 1/2 cup butter
  • 3 large eggs
  • Heat canola oil in large sauce pan until temperature reaches 375F. Try to maintain this temperature (use a thermometer for this purpose), as too low a temperature will make them greasy and too hot will brown them too quickly.
  • Put 1/4 cup of the Parmesan or Romano into a large self-sealing plastic bag. Blend flour, salt, pepper and the remaining grated Parmesan in a bowl.
  • In a saucepan bring water and butter to boil. As soon as the liquids starts to boil remove from stove top and quickly dump the flour mixture into saucepan. Stir for your life until mixture comes together (2 minutes) and return pan to stove top until dough forms a ball and pulls away from the sides of the saucepan (about 2 minutes more).
  • Remove pan from heat and let cool for 1-2 minutes. Stir in one egg at a time until completely blended and smooth.
  • Transfer dough to a piping bag fitted with an large fluted tip. Pipe dough directly into oil (about 4-5 inches long), and cut dough with finger. We are not going for perfection here as different shapes are appealing.
  • Let cook on one side for 2 minutes and then flip to other side for 2 minutes. I wouldn't cook more than 3 at a time so as not to cool oil too much and overcrowd the pan. When Churros are golden remove Churros with thongs to a paper towel lined plate.
  • As you wait for others to cook pop one churros at a time into plastic bag containing Parmesan and shake churros about gently to coat. Serve with little deep fried chilies or hot sauce if desired.
These guys would be great served casually to friends around the pool with some mojitos.

More traditional dessert variation:

Omit the Parmesan, pepper and reduce the salt to 1/8 of a teaspoon. Have a plastic self-sealing bag ready with 1/2 a cup of superfine sugar. Add 1 teaspoon ground anise and a pinch of nutmeg to the flour mixture. Add 2 teaspoons of grated lemon zest to the dough just before the eggs. Deep fry dough just as directed in the savoury recipe. Serve these sweet churros with very rich high cocoa hot chocolate. Churros can also have one end dipped in melted chocolate or be drizzled in chocolate.

...or serve them warm with vanilla ice cream or on their own. They are delicious!

Saturday, April 25, 2009

Key lime pie from delicious. uk


delicious. magazine's UK April issue contains several inspiring recipes: The Roasted cherry tomato tarte tatin will definatley be made by me as soon as tomatoes are edible here. What can make you weep as a Canadian is the greeness of April in England and that their growing season is so much longer than ours especially if you live up north as I do. I comfort myself with the fact that we receive much less rain. The Australian delicious. really highlights the difference climate makes in what you eat and how you entertain. The Australian Christmas issue of delicious. includes the traditional British fare (like sticky pudding), but it also includes many recipes that would only make their appearance in a North-American magazine in July and August. And the overall color palette is so... well...sunny! I am a proud Canadian but I do feel a bit uninspired at this time of year by the long wait before any true local produce will be offered up.

Last Friday I made the Key lime pie from the April issue which, if it depended on local produce, would never be made. It was amazing or should I say delicious? I have typed it up for you below. The recipe makes quiet a large pie so I suggest it as a perfect dessert for when you are expecting guests. I wish I had as I ended up having some for breakfast to.


Key Lime Pie
(I have made several changes for North-American use)
serves 10-12 slices

8 egg yolks
2 x 300 ml cans of condensed sweetend milk
juice and grated zest of 5 limes, plus extra grated zest to decorate
450ml whipping cream (35%)

For crust
200ml unsalted butter, melted, plus extra for greasing
500g graham cookies

1. Pre-heat oven to 350F and grease a large deep dish pie plate. For the crust, roughly break up the cookies and put them in the food processor. Process until finely ground. Slowly pour in the melted butter while the motor is running. Press the mixture into the base and neatly up the sides of the pie plate. Bake for about 20 minutes or until deep golden and firm. Cool completely. Turn oven down to 325F.

2. Put the eggs yolks, condensed milk and lime juice and zest in a glass bowl and mix gently with a ballon whisk until all the ingredients are very well incorporated. The mixture will thicken naturally.

3. Pour into the cold pie crust and bake in the oven for 20-30 minutes. The filling should be firm to the touch but still very slightly soft in the centre (not wobbly!). Cool completely, then cover and chill for at least an hour, or overnight if possible.

4.When you are ready to serve the pie, whip the cream until soft peaks form, them spread over pie. Decorate with the lime zest, slice and serve.


Here is a handy site for when you want to convert celsius to fahrenheit as I did for this Brit. recipe. Click here.


Printer friendly